第一个OpenGL程序
忽然开始对OpenGL感兴趣了。便去看了一下 ogldev 上的tutorial给的demo。
OpenGL(全写Open Graphics Library)是个定义了一个跨编程语言、跨平台的编程接口规格的专业的图形程序接口。它用于三维/二维图像,是一个功能强大,调用方便的底层图形库。
第一个demo
在程序的最开始,通过调用glutInit函数来初始化GLUT:
glutInit(&argc, argv);
The parameters can be provided directly from the command line and include useful options such as ‘-sync’ and ‘-gldebug’ which disable the asynchronous nature of X and automatically checks for GL errors and displays them (respectively).
然后,设置DisplayMode:
GLUT_DOUBLE enables double buffering and the color buffer where most rendering ends up
GLUT_DOUBLE指定系统使用双缓冲,就是有2个color buffer,一个称作前缓冲,一个称作后缓冲,渲染输出的内容都先放在后缓冲中,再通过swapbuffer,交换前后缓冲,这样做,可以防止一帧图像渲染不全的问题。
glutInitDisplayMode(GLUT_DOUBLE | GLUT_RGBA); // GLUT_DOUBLE enables double buffering
接下来设置窗口位置和大小等参数,并创建窗口:
glutInitWindowSize(400, 300);
glutInitWindowPosition(100, 100);
glutCreateWindow("tutorial-01: Open a window.");
然后设置消息循环的回掉函数:
glutDisplayFunc(InternalCB); // This function is continuously called by GLUT internal loop.
因为我们都工作在一个窗口系统最有正在运行的程序的交互通过事件回调函数发生。 GLUT需要与底层窗口系统交互,为我们提供了一些回调选项。在这里,我们只使用一个“main”回调做一帧的所有渲染。这个功能是通过GLUT内部循环连续地调用。
接下来,初始化glutWindow:
// The color has four channels (RGBA) and it is specified as a normalized value between 0.0 and 1.0.
glClearColor(0.0f, 1.0f, 1.0f, 0.0f);
这个函数调用用来设置清除帧缓冲(后述)时将要使用的颜色。
最后,通过调用glutMainLoop来讲程序的事件控制交给GLUT的内部时间循环:
glutMainLoop();
在这之后,GLUT将会仅仅调用已经注册的回掉函数(此处为通过glutDisplayFunc注册的InternalCB)来重新绘制GLUT窗口。在这个demo里,InternalCB仅仅是用颜色填充framebuffer,并且交换backbuffer和frontbuffer, and the current backbuffer will be displayed:
把先前的画面给清除,这基本是定律,每次重绘之前都要把原来的画面擦除,否则叠加起来什么都看不出了。
glClear(GL_COLOR_BUFFER_BIT);
交换backbuffer和frontbuffer:
glutSwapBuffers();
另外,如果是采用单缓冲,glutInitDisplayMode(GLUT_SINGLE | GLUT_RGB), 使用glFlush()来刷新显示,不必再交换缓冲区:
glFlush();
使用MinGW编译
为了能够使用MinGW gcc来编译OpenGL程序,需要安装GLUT库,这儿使用freeglut。
编译:
gcc -c window.c -o window.o
链接,需要链接freeglut的库:
gcc window.o -o window -lfreeglut -lopengl32
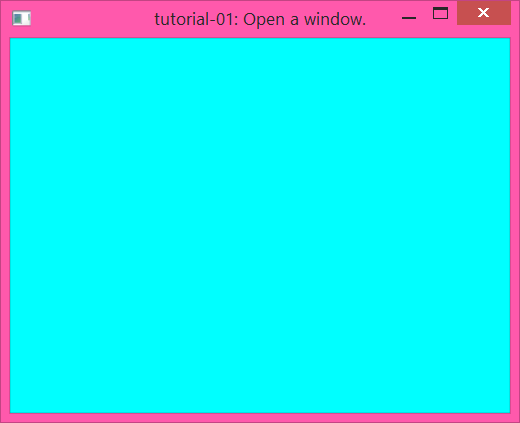
得到window.exe,运行截图如下:

Python实现
也可以用PyOpenGL(OpenGL的Python Binding)来实现这个功能,PyOpenGL的API和OpenGL的C语言接口很相似:
#! /usr/bin/env python3
# -*- encoding: utf-8 -*-

from OpenGL.GL import *
from OpenGL.GLU import *
from OpenGL.GLUT import *

def plotfunc():
    glClear(GL_COLOR_BUFFER_BIT)
    glutWireTeapot(0.5)
    glutSwapBuffers()

def guimain():
    glutInit(sys.argv)
    glutInitDisplayMode(GLUT_DOUBLE | GLUT_RGB)
    glutInitWindowPosition(100, 100)
    glutInitWindowSize(400, 400)
    glutCreateWindow(b"first window")
    glutDisplayFunc(plotfunc)
    glClearColor(0.0, 1.0, 1.0, 0.0)
    gluOrtho2D(-1.0, 1.0, -1.0, 1.0)
    glutMainLoop()

if __name__ == '__main__':
    guimain()
注意在glutCreateWindow(b"first window")语句中使用的是b'',如果不这样,便会产生这样一个错误:
ctypes.ArgumentError: argument 1: <class 'TypeError'>: wrong type
这是因为:Python的ctypes模块提供了和C代码库进行通信的数据类型,如果给这个函数仅仅是传递一个字符串,在Python 3中,这个字符串默认是Unicode字符串,而C库的函数期望ASCII字符串作为参数,因此,会出错。
解决方法:使用b''按照字节(bytes)来传递参数。
去掉Console窗口
在运行opengl程序时会同时出现一个Console窗口和一个OpenGL GUI窗口。
对于Python程序,将源代码的后缀名改为pyw,就能去掉Console窗口。
对于C程序,链接时编译时加上-mwindows或者-Wl,-subsystem,windows选项来将subsystem设置为windows即可。
如果使用的是VC++编译器的话,可以这样做:
#pragma comment( linker, "/subsystem:\"windows\" /entry:\"mainCRTStartup\"" )
源代码: window.c, Makefile, window.pyw
OpenGL绘制Utah teapot
Utah teapot 是在计算机图形学界广泛采用的标准参照物体。以一个茶壶作为基本物体的想法,与的“Hello World”程序如出一辙。目的是,方便快捷地建立一个最简单的三维场景,使其含有相对复杂的模型,以此模型为基本参考几何物体,用以辅助安排场景和设定灯光。
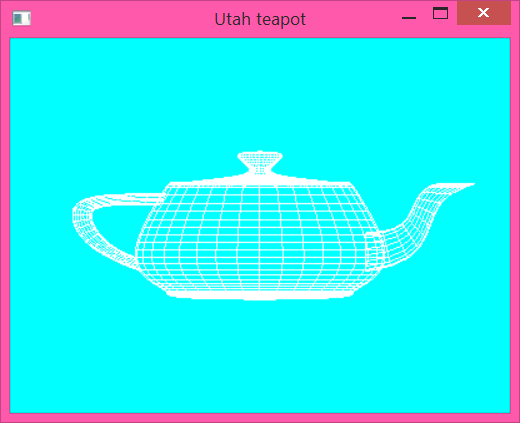
GLUT库提供了函数glutWireTeapot和glutSolidTeapot来绘制不同的Utah teapot,只需要更改glutDisplayFunc()注册的回掉函数InternalCB即可:
static void InternalCB()
{
    // clear the framebuffer
    glClear(GL_COLOR_BUFFER_BIT);

    glutWireTeapot(0.5f);

    // tells GLUT to swap the roles of the backbuffer and the frontbuffer.
    // In the next round through the render callback we will render into
    // the current frames front buffer and the current backbuffer will be displayed.
    glutSwapBuffers();
}
效果显示:

绘制图元
点是最为基础的图元, glVertex(x, y[, z[, w]])函数用来画点。一般2D的用两个,形式为glVertex2f(x, y);3D的用三个,自然就是glVertex3f(x, y, z)。
OpenGL所有的绘图指令,都必须包含在glBegin()和glEnd()之间。glBegin()的参数告诉OpenGL这些点最终的绘制方法,如果单纯是画点GL_POINTS,这画三个点就是孤立的画出来,如果是其他的比如多边形GL_POLYGON,那么画三个点结果就是组成一个三角形。虽然绘制点的方法完全一样,因为给的参数不同而导致了不同的结果。
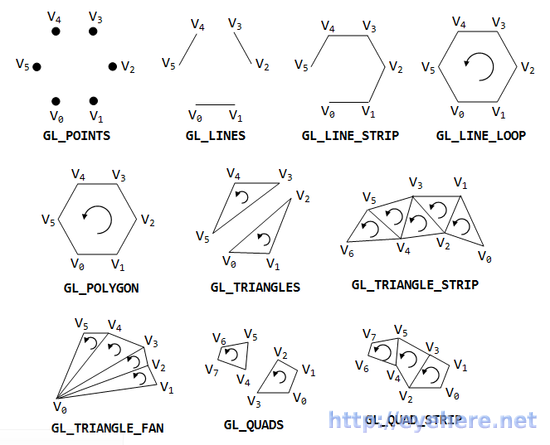
glBegin()提供的图元有:
| 参数 | 含义 |
|---|---|
| GL_POINTS | 单个顶点集 |
| GL_LINES | 线段 |
| GL_LINE_STRIP | 不闭合的连续线段 |
| GL_LINE_LOOP | 闭合的线段 |
| GL_POLYGON | 多边形 |
| GL_TRAINGLES | 独立三角形 |
| GL_TRAINGLE_STRIP | 三角形串,线性连续 |
| GL_TRAINGLE_FAN | 三角形串,扇状连续 |
| GL_QUADS | 独立四边形 |
| GL_QUAD_STRIP | 四边形串 |
关于这些图元的定点的绘制顺序的解释如下:

gluOrtho2D函数是OpenGL中的二维裁剪函数,函数原型为:
void gluOrtho2D(GLdouble left, GLdouble right, GLdouble bottom, GLdouble top)
glPolygonMode()指定了如何绘制面的方式,函数原型:
void glPolygonMode(GLenum face,GLenum mode)
face这个参数确定显示模式将适用于物体的哪些部分,控制多边形的正面和背面的绘图模式:
- GL_FRONT表示显示模式将适用于物体的前向面(也就是物体能看到的面)
- GL_BACK表示显示模式将适用于物体的后向面(也就是物体上不能看到的面)
- GL_FRONT_AND_BACK表示显示模式将适用于物体的所有面
mode这个参数确定选中的物体的面以何种方式显示(显示模式):
- GL_POINT表示显示顶点,多边形用点显示
- GL_LINE表示显示线段,多边形用轮廓显示
- GL_FILL表示显示面,多边形采用填充形式
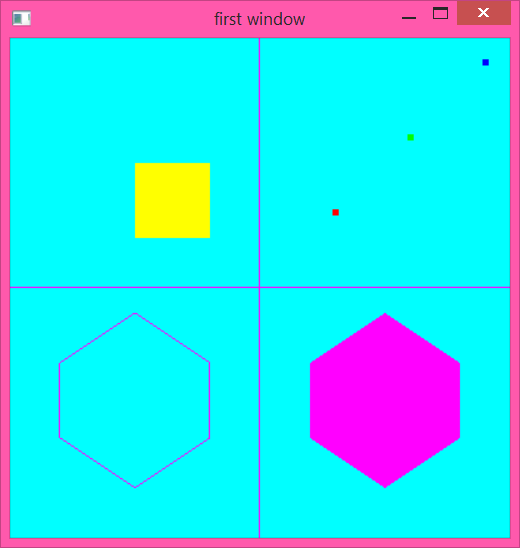
使用OpenGL绘制几何图形的例子:
绘制点:
glPointSize(5.0)
glBegin(GL_POINTS)
glColor3f(1.0, 0.0, 0.0)
glVertex2f(0.3, 0.3)
glColor3f(0.0, 1.0, 0.0)
glVertex2f(0.6, 0.6)
glColor3f(0.0, 0.0, 1.0)
glVertex2f(0.9, 0.9)
glEnd()
绘制线:
glBegin(GL_LINES)
glVertex2f(-1.0, 0.0)
glVertex2f(1.0, 0.0)
glVertex2f(0.0, 1.0)
glVertex2f(0.0, -1.0)
glEnd()
绘制多边形:
glPolygonMode(GL_FRONT, GL_FILL)
glPolygonMode(GL_BACK, GL_LINE)
glBegin(GL_POLYGON)
glVertex2f(0.5, -0.1)
glVertex2f(0.2, -0.3)
glVertex2f(0.2, -0.6)
glVertex2f(0.5, -0.8)
glVertex2f(0.8, -0.6)
glVertex2f(0.8, -0.3)
glEnd()
效果图: